Starting your online entrepreneurship journey has never been easier thanks to Shopify. The platform allows you to create your own beautiful online store within a few minutes (or hours, to be fair).
The best thing is that you don't need any technical knowledge or pay any development charges. Here are 10 simple steps to get your Shopify store up and running.
1. Register for your free Shopify trial
As a first step you will need to register to Shopify. Make sure to take the advantage of the Shopify trial, so you will have 2 weeks to build out the store for free without any charges or limitations.

The registration process is straightforward and doesn't require credit card. In case you need any help with going through, check our article about Shopify Trial.
If you're wondering what's the difference between Basic, Shopify, and Advanced subscriptions, read our comparison of Shopify plans.
2. Get your content and designs ready
Before you start with any store building, make sure you have your content and media ready. You'll need following items:
- Logo
- List of all products and their description (price, collections, weight, material, etc.)
- Product photos or videos
- Content for all of your pages (about us, FAQs, contact us, legal texts, etc.)
- Brand manual (brand colours, fonts, icons, graphic elements, etc.)
If you are not sure what to sell or where to find your supplier, use Oberlo. With Oberlo you can easily import and resell (dropship) any products from AliExpress.
3. Choose a theme
Once you have created a Shopify account, you can start looking for an ideal theme for your store. Shopify theme store currently offers 4 free themes and countless paid themes. Themes description always contain info on what type of business they are suited to. Choose a theme that fits your business goals and upload it into your store.

If you are just starting with your business, the free theme will definitely do the job. We recommended choosing a theme which is Online Store 2.0 ready.
3. Add products
Now it's time to add products to your store. Each product can have a different variant. So for example if you are selling t-shirts you will have a product called "T-Shirt" with variants like size and color.
- Go into the “Products” section and click on the button “Add a product”
- Name it and add all the necessary info to the product
- Then save the products and create the rest of your product portfolio

If you have more than 10 products, consider creating a CSV file and upload the products at once (here's how).
4. Create collections
After you load the products, it's a good time to create collections in your store. Collections are basically sets of products. You can think of them as categories.
- Go into the “Collections” sub-section and click on the “Add a new collection” button
- Name the new collection, save it and then add your products
- New collection is now ready

The main goal of collections is to ease a store navigation for your visitors. If you have a lot of products, you can take advantage of the automated collections which contains products based on the set filter.
5. Create pages
Each online store needs a few static pages to build visitor's trust and present your store as a legitimate business.
- Click on “Online store” and go into “Pages”
- Click on the “Add a new page” button
- Name the new page and save it
- Create the rest of the pages in the same way

Don't forget to prepare your content as you will be soon inserting into different sections in the theme editor.
6. Create the navigation
After you are done creating your pages, it's time to put them in a menu. In Shopify the menu is called navigation. Keep your customers in mind while creating the menus. Make it simple and easy to understand.
- Go into “Navigation” and click on “Add a menu”
- Add the pages that you want your menu to contain
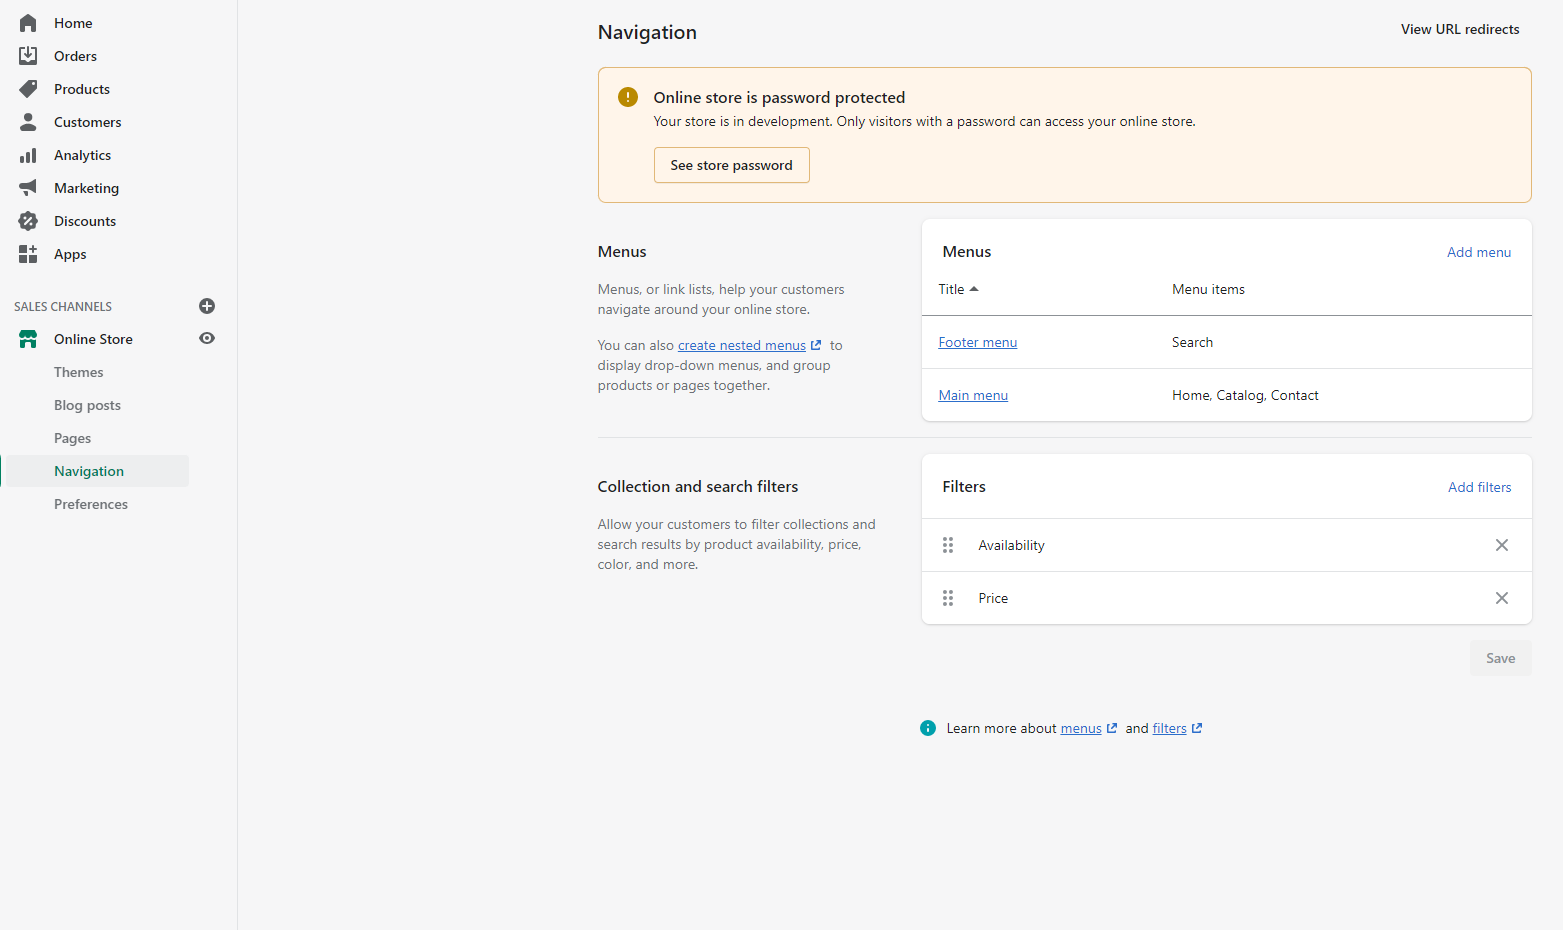
After you have created new menus, you will place them into the header, footer and sidebar filters in the theme editor.
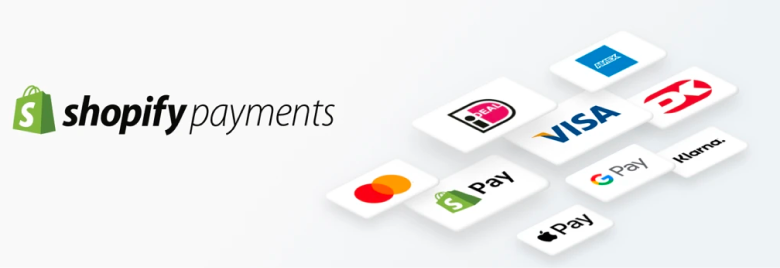
7. Set-up your payment and shipping options
Now it's time to set up the payment collection process and shipping options so you can start selling. Standard payment options are payment by card or PayPal, but we definitely recommend using Shopify Payments if they are supported in your region. Specifically Stripe – based on our experience, it is the safest payment gate in the world, it’s integrated directly in Shopify and allows you to return money straight from Shopify admin orders.
- To set-up your payments, go into the settings and click on “Payments”
- To set-up your PayPal payment option, click on “Express PayPal checkout”, create your account and fill in your details
- When setting up your card payments, we recommend implementing Stripe
If you have trouble setting Stripe up, let us know and we will make sure that your card payments are set-up in no time. Go to our Digismoothie Store and order the Stripe implementation, so you can start selling immediately.
To set up shipping methods, create an account or even close a contract with one of the main delivery providers like USPS or FedEx. If you plan to start on Advanced Shopify or Shopify Plus plans, your checkout will automatically calculate shipping rates based on distance. Using that, you can save quite a lot of money when you start sending out more packages.
- To set-up shipping methods for your checkout, go into “Settings” and then into “Shipping and delivery”
- Put in your address, create new zones based on where you want to ship and then create new shipping methods
- Name the new method and add your shipping prices
8. Insert content into your theme
Finally, let’s put content into your theme and polish the design a bit.
- First, add links or menus into your header
- Then add sections to your pages, as you see fit
- Add the photos and text into the selective sections
- Don’t forget to insert menus into your footer
- In the theme settings, insert your logo, set your fonts, add the colours and set-up the rest of the elements on your store
9. Check and test
Before you set your store live it's really important to test out all the key flows. Make sure to run the tests on both desktop and mobile devices.
- Make a test order and check that the payment went through
- Check your spelling
- Check the quality of your images
- Check if all the links work and lead to the right pages
Are you not sure if your new store is fully functional and without any errors? Let us know and our specialized team will audit your entire store.
10. Publish your store
It's go time! Now you need to connect your store’s domain.
- Go into your settings, click on “Domains” and then “Connect a new domain”
- Make your new domain the primary one
Please note Shopify doesn’t offer any mail services to added domains. For this purpose, you can use Forward Email.
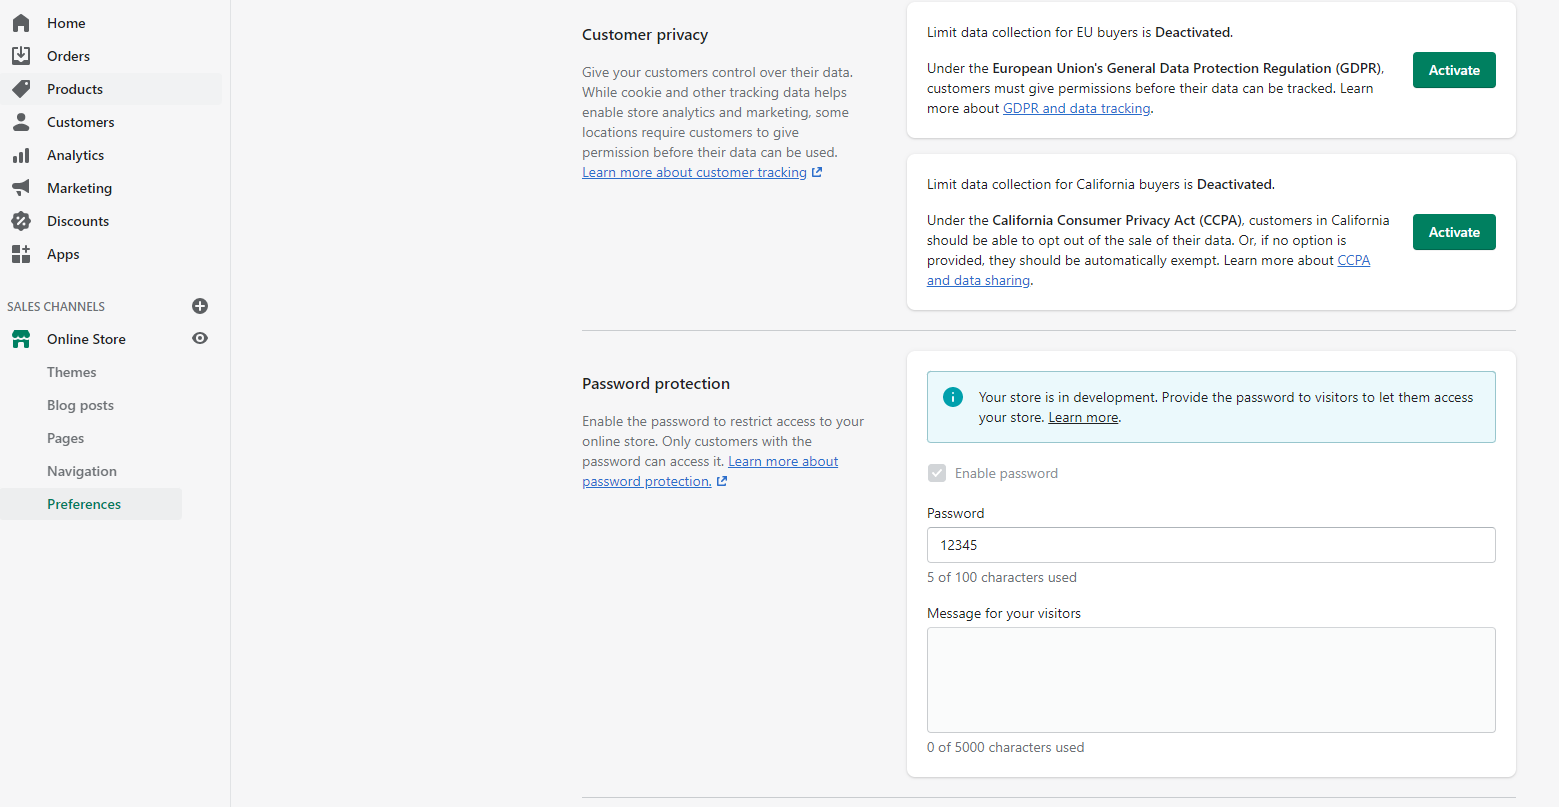
The last step is to deactivate the password on your store. Then your store will be made visible to other users and not just you.
- Click on the section “Online store” and go into “Preferences”
- Uncheck “Enable password” and click on "Save"
After checking your content, return into Shopify admin and click on “Publish my theme”. From now on, your store is visible to other users. Congratulations!
Conclusion and your next steps
After you launch your store and get your first orders, it's time to optimize it. Here are some of our best guides to help you with that.
- SEO Guide – Learn how to do SEO on Shopify to attract organic traffic to your store
- Checkout Guide – Learn how to optimize the Shopify checkout to perform at its best
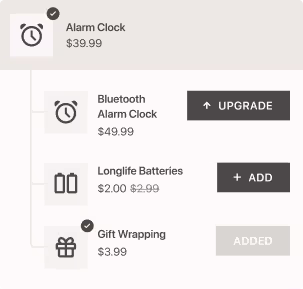
- Upsell Guide – Learn how to implement upsell strategy into your Shopify store and increase average order value